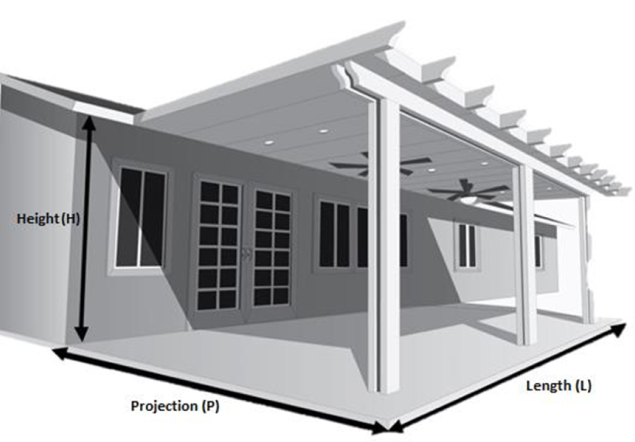
The patio cover project size, height, projection, and length are the first step when choosing your patio cover Kit. The projection is the distance the cover extends from your attachment point. The length represents the patio cover’s span along the structure. The patio cover kits offers a range of sizes based on your project plans and it’s important to be aware of the certain limitations that may apply depending on the patio cover type, affecting both the maximum post spacing and projection as the projection has load rating limitations. (e.g 10lbs, 20lbs live load). Longer projections are possible by using thicker roof panels (e.g 4” or 6” insulated roof panels) or you can use a 3” insulated roof panel using the Multi-Span method which is adding an additional 3X8 beam between the ledger and header beams. The extra 3X8 beam reduces the loads between the ledger and header beams, allowing to safely further project. Of course, if you have questions, you may always Contact us for guidance.
P = Projection - from the house
W = Width- side - side
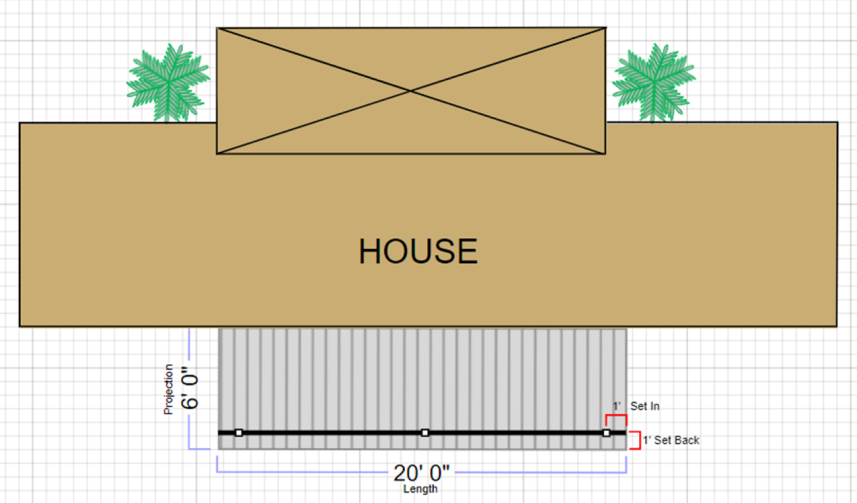
‘Dimensions’ refer to the total shade portion (roofing),posts will sit 1’ – 2.’ in from the total ceiling projection.This is also known as front overhang.
Length dimension should be total ceiling cover from left to right. Posts are placed 1’-2’ in on each side. This is also known as side overhang.
The post placement is considered the “footprint”. The roofing measurement is considered total “dimensions”.
The height dimension is the height to the point of wall/eave attachment before any water drainage slope is added.
Determine the projection of the patio cover from the house and measure its length along your house. Simply follow the instructions below, and if you need any assistance, feel free to Contact us for guidance.
Patio projection: Measure and mark at the attachment point on the house and to where the patio cover will end. This is known as the projection of the patio cover.
Patio length: Measure and mark the length at the point where the patio cover will begin and end. This is known as the width of the patio cover.
Patio height: To obtain the height measurement, mark the height where the bottom of the patio cover ledger attaches to the house. Please Note: Unless you are building an open lattice cover, you don’t want your patio cover roof to be level and should add ¼” to 3/8” inch slope per projection foot for adequate water drainage. Additionally, remember to account for header beam header beam heights. 3X8 Single header beams will add approximately 8” to the lower roof height and 3X8 double header beam will place the lower roof at the exact post height. Once these measurement are determined, you will know the post height requirements.
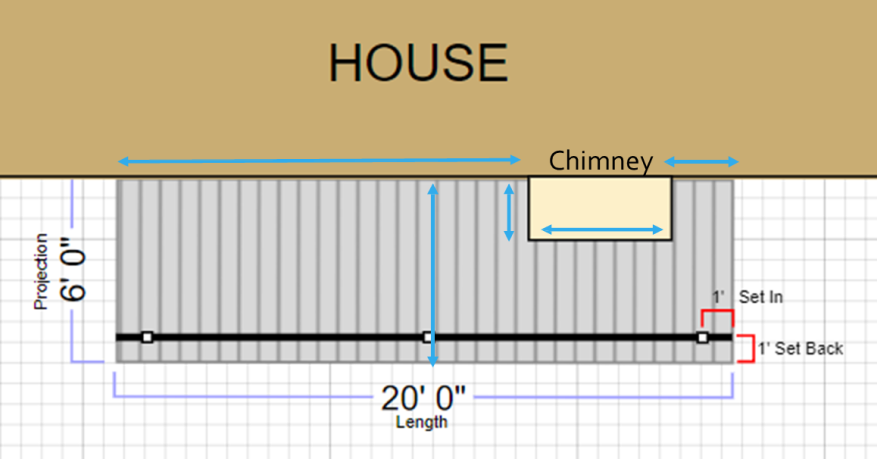
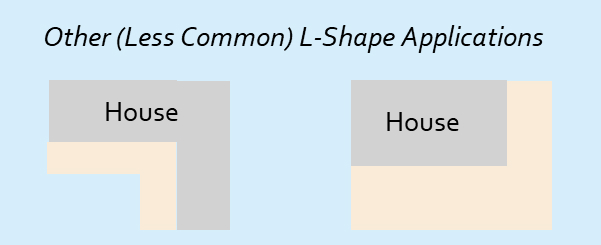
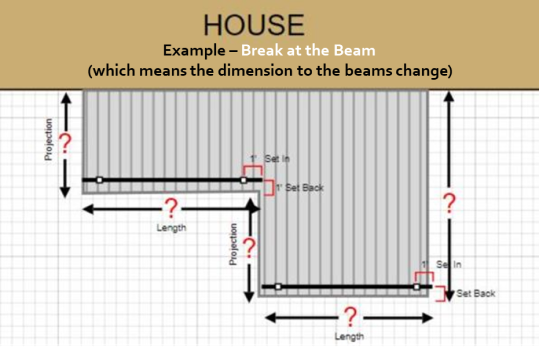
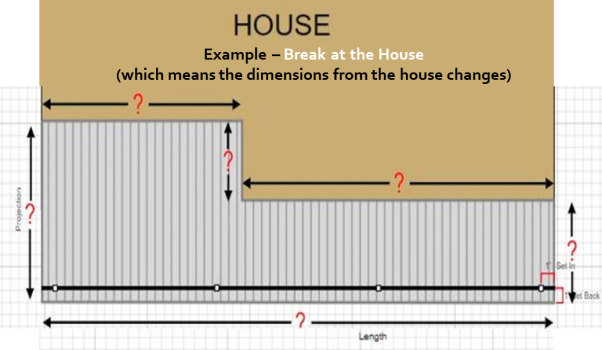
If your home has an offset wall, protruding nook, bay window, enclave, chimney, and/or any other obstacle, you can break the measurements from beginning to end of each measurement run…then add all measurements together to arrive at the total length. Additionally, it would be helpful to submit a simple drawing to illustrate the dimensions along with photos of the project site and attach it to your quote submittal form. Of course, if you’re unsure about where to start or just simply need assistance, feel free to Contact us for guidance.
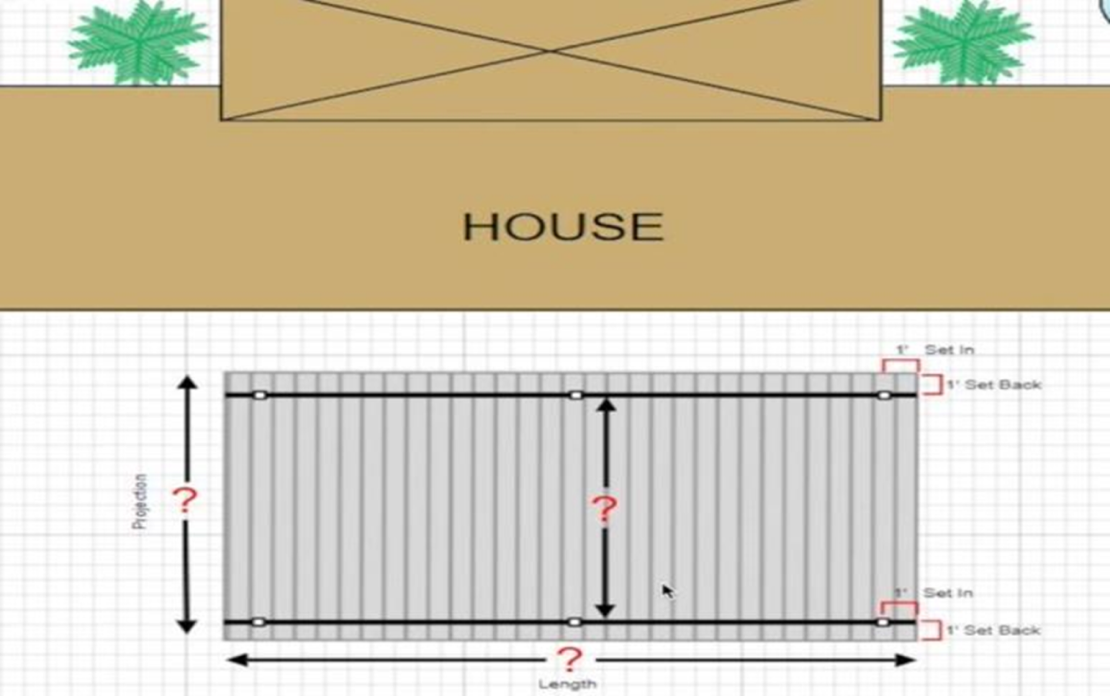
Projection: With a freestanding cover the projection runs across the two beam lines. The solid covers roof panels span across the two beam lines, and on the pergola covers the rafters span across the beams.
Freestanding length:The width of the cover is the direction of the header beams.